During the DIY PC building process, minor mistakes can escalate into severe hardware failures. Choosing the wrong components, forcing installation, or missing key steps can result in anything from blue screens to a burned-out motherboard. Mastering the following 10 common building pitfalls can significantly improve your PC assembly success rate.
1. Ignoring Power Supply Quality and Power Redundancy
Skimping on the power supply unit (PSU) during budget allocation is a common beginner mistake. The PSU is the heart of the gaming PC; you must calculate the exact peak power consumption of the CPU, GPU, and other components before purchasing. The rated power of the purchased PSU should be at least 20% to 30% higher than the theoretical peak to leave room for upgrades and ensure stable output. Refer to the "80 PLUS" certification system and choose products ranging from White to Titanium based on budget. Never use unbranded, low-quality PSUs.
2. Hardware Incompatibility
Strict compatibility barriers exist between different generations of CPUs and motherboard chipsets, as well as between different RAM specifications and motherboard slots. Before purchasing, use online compatibility checking tools like PCPartPicker, or directly consult the QVL (Qualified Vendor List) on the motherboard manufacturer's website to verify if core components like the CPU and RAM are supported by the current motherboard.
3. Missing the I/O Shield and Motherboard Standoffs
The I/O shield protects the rear interfaces of the case and must be snapped into the back panel before placing the motherboard inside. Discovering it missing after all hardware is installed usually requires a complete disassembly. Furthermore, motherboard standoffs are absolutely essential. Standoffs maintain an insulating distance between the bottom of the motherboard and the metal case. Screwing the motherboard directly to the case without standoffs will highly likely cause a short circuit upon booting, instantly burning out the motherboard circuits.
4. Misjudging Case Dimensions and Physical Interference
Do not choose a case based solely on appearance. Insufficient internal physical space redundancy causes severe issues. For example, a high-end graphics card that is too long prevents the side panel from closing, or a tower CPU cooler exceeds the case's height limit. Before purchasing, cross-check the GPU length limit, cooler height limit, and PSU shroud length to ensure the case provides reasonable space for airflow.
5. Incorrect Cooling Airflow Configuration
The installation direction of case fans directly determines cooling efficiency. The correct airflow is typically "front/bottom intake, rear/top exhaust." Installing all fans backwards leads to airflow competition or a "hotbox" effect where heat accumulates. When running heavy games, the computer will quickly hit the thermal limit, causing the CPU and GPU to downclock and stutter.
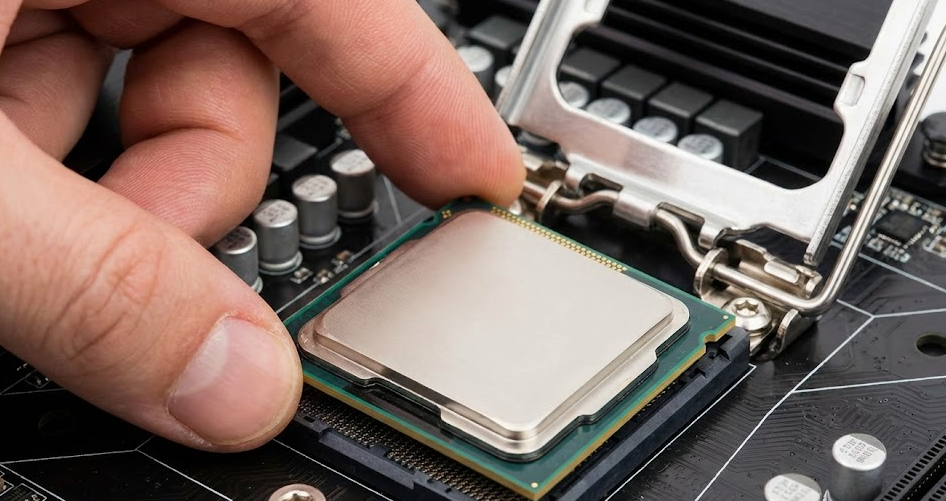
6. Ignoring Fool-Proof Designs and Forcing CPU Installation
Both CPUs and motherboard sockets have "fool-proof" designs. A golden triangle mark on the CPU corner must perfectly align with the triangle mark on the motherboard socket. During installation, the CPU should drop into the socket naturally by its own weight; applying external downward pressure is strictly prohibited. Forced pressing will bend or break the socket pins (Intel) or the CPU pins (AMD).
7. Improper Thermal Paste Application
Thermal paste fills the microscopic gaps between the CPU heat spreader and the cooler base. Applying too little causes heat transfer interruption; applying too much may cause it to overflow and contaminate the motherboard socket. Squeezing a pea-sized amount in the center of the CPU is sufficient; the pressure from the cooler mount will spread it evenly. Note: Some new coolers come with a transparent plastic protective film on the bottom. It must be removed before installation, otherwise it acts as a thermal insulator.
8. Mixing RAM Channels and Specifications
To activate dual-channel memory for optimal performance, do not plug RAM sticks into adjacent slots arbitrarily. Standard motherboard manuals explicitly state the priority slot sequence (usually slots 2 and 4). Push down evenly on both ends until a "click" is heard. Additionally, strictly avoid mixing RAM sticks of different capacities, frequencies, or CAS latencies. Mixing forces the system to run based on the lowest-spec stick, slowing down speed and causing system instability.
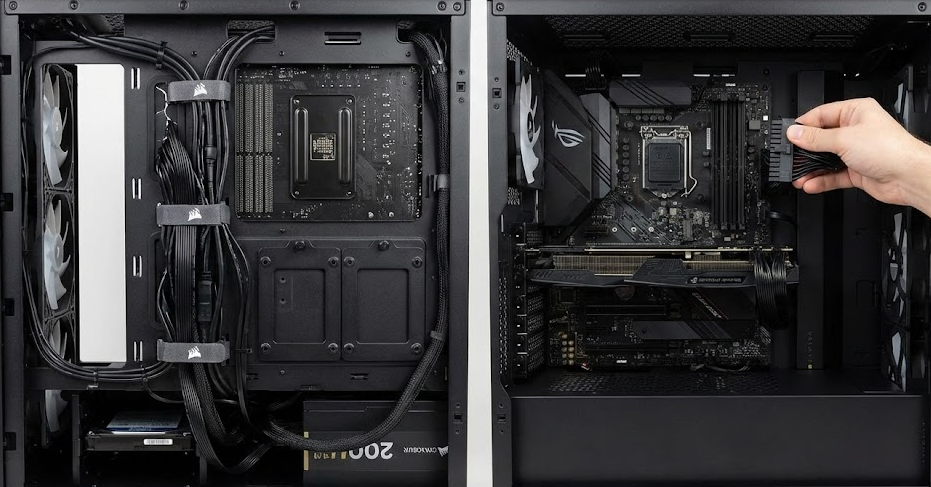
9. Skipping the Motherboard Manual and Blind Wiring
The front panel header pins (power button, reset button, indicator lights) and power cable connectors are highly complex. The motherboard manual is the standard wiring diagram, detailing the definition of each pin. Plugging in cables based on guesswork without the manual can lead to boot failure or reversed polarity damaging components. Cable management should also follow standard routing to prevent cables from interfering with cooling fans.
10. Neglecting Post-Build BIOS and Driver Deployment
Lighting up the hardware is only the first step. Upon entering the OS, the primary task is to download the latest BIOS firmware from the motherboard website and flash it to resolve early hardware compatibility bugs. Following that, sequentially install the motherboard chipset drivers, GPU drivers, and network card drivers. Skipping these software configurations prevents the hardware from reaching its peak performance limits.